- Published on
Deploy (Copy) Static Blog to S3
Part 1 of "Deploy Static Website To AWS"
Welcome to the Series
This blog series will explore different methods of deploying and managing a website (this website) in AWS. The end goal of the series is to take an existing website and provide ideas and examples on improving previous work. Each post serves as a stepping stones from a quick and easy approach strategy to fully automated deployment pipelines using Infrastructure as Code and Dev/Ops principals.
Table of Contents
Overview
This post focuses on quickly getting your content out to the world with little more than an idea. No front-end or back-end required to get started, just the pre-rendered static content. That is how this very site began...
The Goal
With AWS, your static site can be deployed and live within a matter of minutes with little configuration. AWS's bucket storage (S3) supports this natively and is the starting point of our journey into finding the right solution.
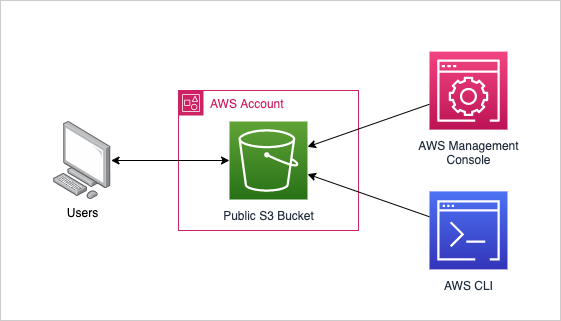
This part focuses on serving the static site from S3 using S3's native website endpoint. It is as simple as copying the rendered static files to a public S3 bucket configured for static hosting. 
Pre-Requisites
- An AWS account
- AWS CLI installed and configured
- A registered domain name (optional but recommended)
- AWS will provide a domain
- Domain name purchased or transferred to Route 53 (optional but recommended)
Limitations
- HTTP requests only
- No caching
- Can be cumbersome to manage changes, as each change in the website (adding a blog, changing the front-end visuals, etc) requires the static content to be built and copied to S3
Prepare Your Static Site
[Optional] Find/Create a Starting website
Assuming you are starting without a website (as was our approach), track down a starting website/template that fits your needs. When looking for something to get you started it is important to have an understanding of your needs, skills, and the final product. When looking for out site we focused on the following criteria:
- Static Site
- A technical requirement to hosting our content entirely on S3 (the goal of this post)
- Time
- Number one criteria
- Maximize time spent on content without worrying about the front-end
- Converts blog posts from markdown to html
- Most syntax and styling required by the blog posts is covered by markdown styling
- Standardized format for blog content
- Once the site is created no additional front-end work is required for the blog capability
- React.js code base or similar
- Based mainly on skill and previous experience
- Massive community, meaning more support and templates to choose from
- Component based
- Clean and simple design
- Mobile optimized
- Supports light and dark mode
This site is build using the Tailwind Next.js Starter Blog template developed by timlrx. This template is specifically designed using Next.js to be deployed with Vercel. It may be a better option to deploy as intended, however these instructions are designed to be transferable to any site that is built as a static site or built with frameworks/libraries which render into static files.
Firstly, start by creating a directory. In the command line, execute the following:mkdir PROJECT_NAME
Navigate to the directory:cd PROJECT_NAME
Clone from the site from the template:npx degit 'timlrx/tailwind-nextjs-starter-blog#contentlayer'
Build
Install package dependencies:npm install
Build the static content:npm run build
Render and serve the site locally:npm run dev
Visit the endpoint at http://localhost:3000 to view the compiled site.
Export Static Files
The static website (HTML, CSS, and JS files) needs to be output so they can be copied to S3. Some projects will output these as part of the build command or may require some additional config.
Note: These steps were required in order to export the starter blog template's static files. If using a different framework or front-end, the following may be different. Change the following file line in the package.json file in order to export static files when on build
// package.json
"scripts": {
  "build": "next build && next export"
}
Render the static content:npm run build
The below error is specific to the starter template used in this example. When reviewing the documentation, the Image component is designed to dynamically serve the images and is not supported for static builds. Building yields the following error:
Error: Image Optimization using Next.js' default loader is not compatible with `next export`.
  Possible solutions:
    - Use `next start` to run a server, which includes the Image Optimization API.
    - Use any provider which supports Image Optimization (like Vercel).
    - Configure a third-party loader in `next.config.js`.
    - Use the `loader` prop for `next/image`.
  Read more: https://nextjs.org/docs/messages/export-image-api
In order to resolve this we can change all Image tags to img as per the documentation. This needs to be updated in the following locations:
- components/Card.tsx
- components/MDXComponents.tsx
- layouts/AuthorLayout.tsx
- layouts/PostLayout.tsx
As per the docs here by removing the imgToJsx plugin (in this project it appears to be remarkImgToJsx) from contentlayer.config.ts.
Build the static content:npm run build
Render and serve the site locally:npm run dev
What's Going On?
In this section, we have cloned and saved the site locally. The npm run dev command renders the code into it's HTML static components and serves these via a local server. Each time a change is made to the front-end content, the code needs to be compiled in order to view the changes. Thankfully, this is handled for us.
The build outputs the compiled static html, js, and css files to the out/ directory.
[Optional] Track Changes using GitHub
Track changes to your site by uploading the code to GitHub. In addition, GitHub can be used to trigger builds and deployments which will be explored in later posts.
To push your local changes to a new repository create empty repo in GitHub and push your changes to the repo:git init -b main
Select local files/changes to the repo:git add .
Stage the files/changes with a commit message:git commit -m "Initial commit"
Push staged files/changes to the repository:git remote add https://github.com/<USER>/<PROJECT>git push -u origin main
Create the public S3 Bucket
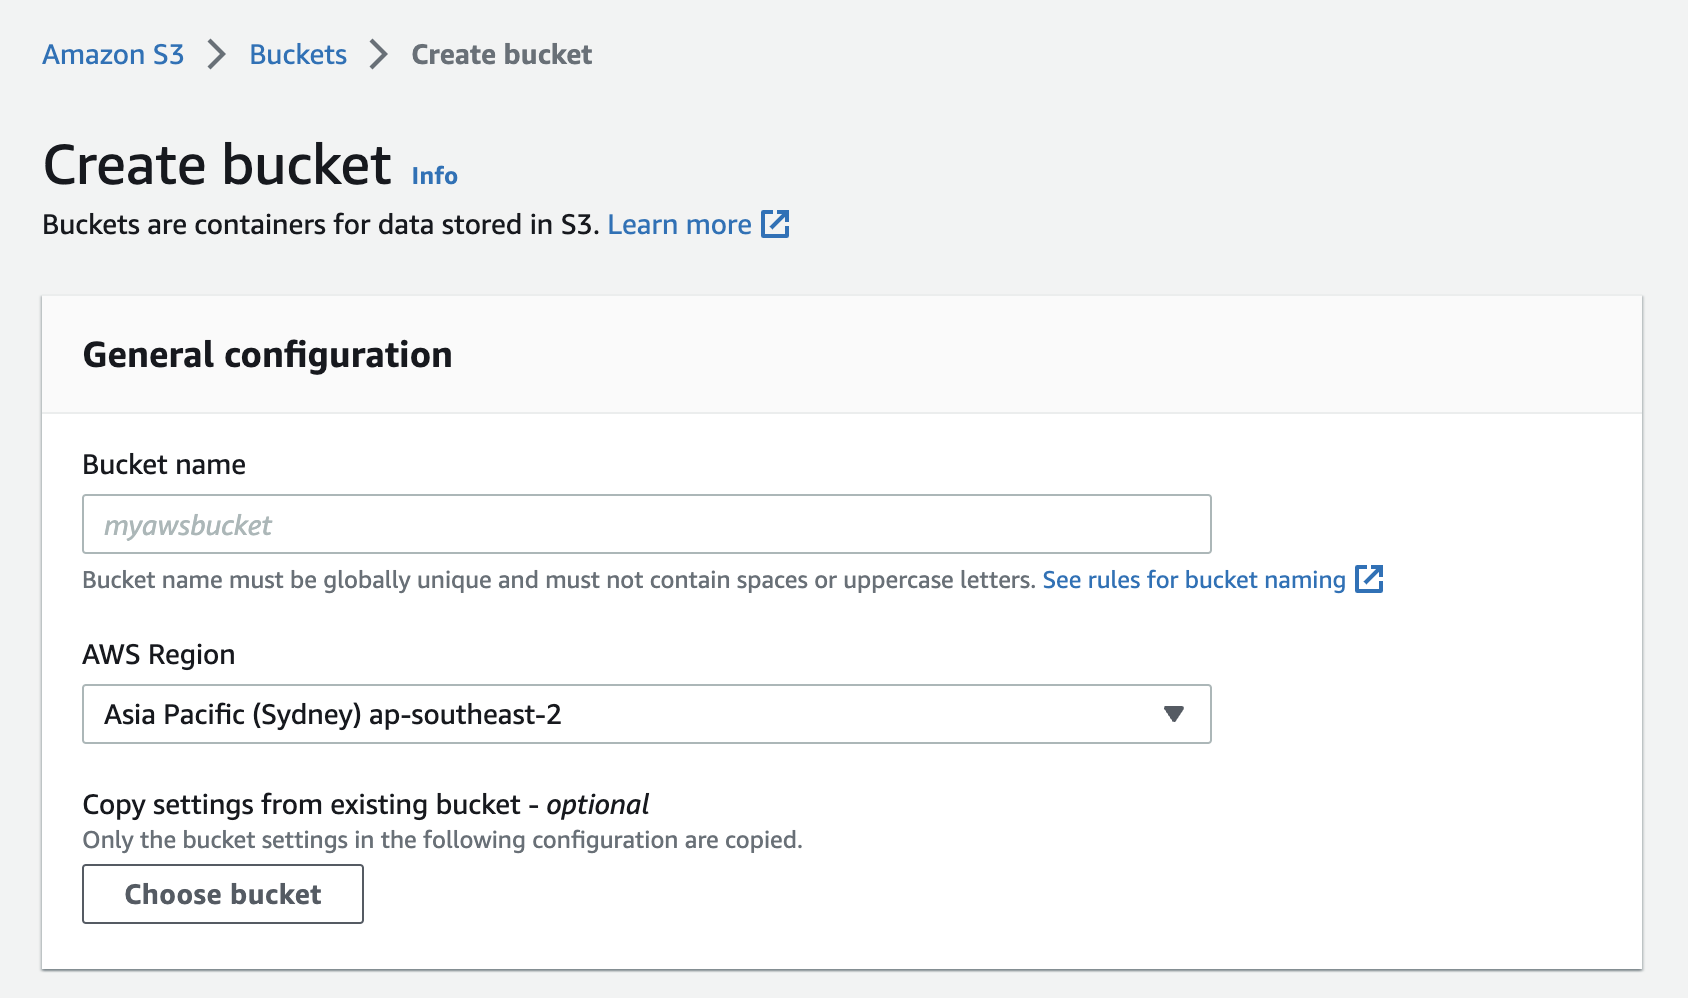
In the AWS Management Console, navigate to the S3 resource page and create a new bucket. In order to use an existing domain name, ensure the bucket name is the same as the domain. For example for the domain example.com, create the bucket named example.com. 
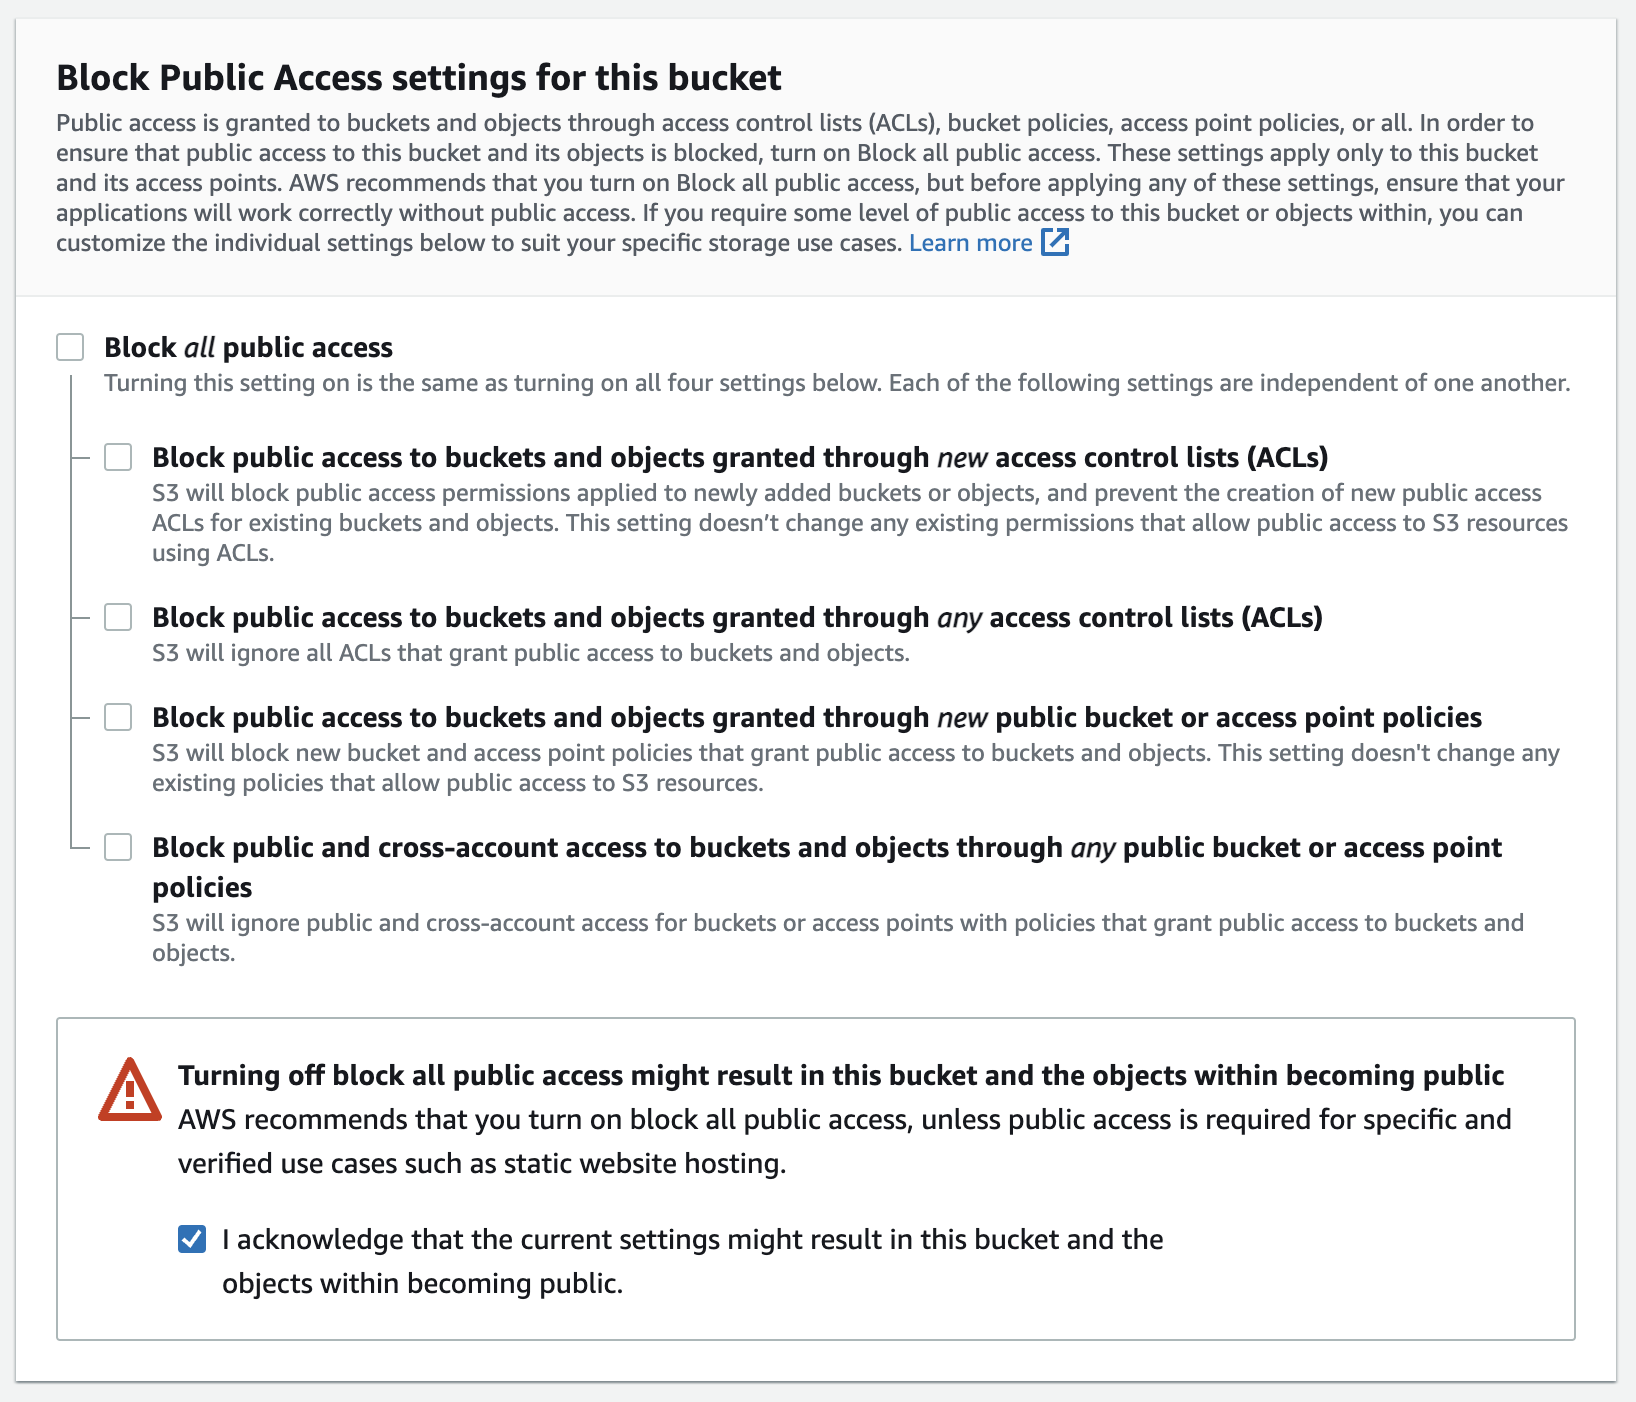
In order to enable to be public access to the bucket via the url (created later), the following two criteria need to be met:
- Bucket and it's contents needs to be public
- A bucket policy allowing read access to the contents needs to be attached to the bucket
Public Bucket Settings
| Field | Value |
|---|---|
| Bucket name | needs to match domain name: example.com |
| AWS Region | Select the region you intend your resources to be housed in |
| Block Public Access settings for this bucket | Un-tick the 'Block all public access' option and leave all sub option's un-ticked. Tick the acknowledgement |

Add Read Access via Bucket Policy
Public access needs to be granted on the S3 bucket policy. This can be done by attaching the below policy, which grants read access to all objects in the example.com bucket, from the bucket's "Permissions" tab. The policy allows for all objects to be read () See the following AWS Documentation for more information.
{
    "Version": "2012-10-17",
    "Statement": [
        {
            "Sid": "AllowPublicReadAccess",
            "Effect": "Allow",
            "Principal": "*",
            "Action": "s3:GetObject",
            "Resource": "arn:aws:s3:::example.com/*"
        }
    ]
}
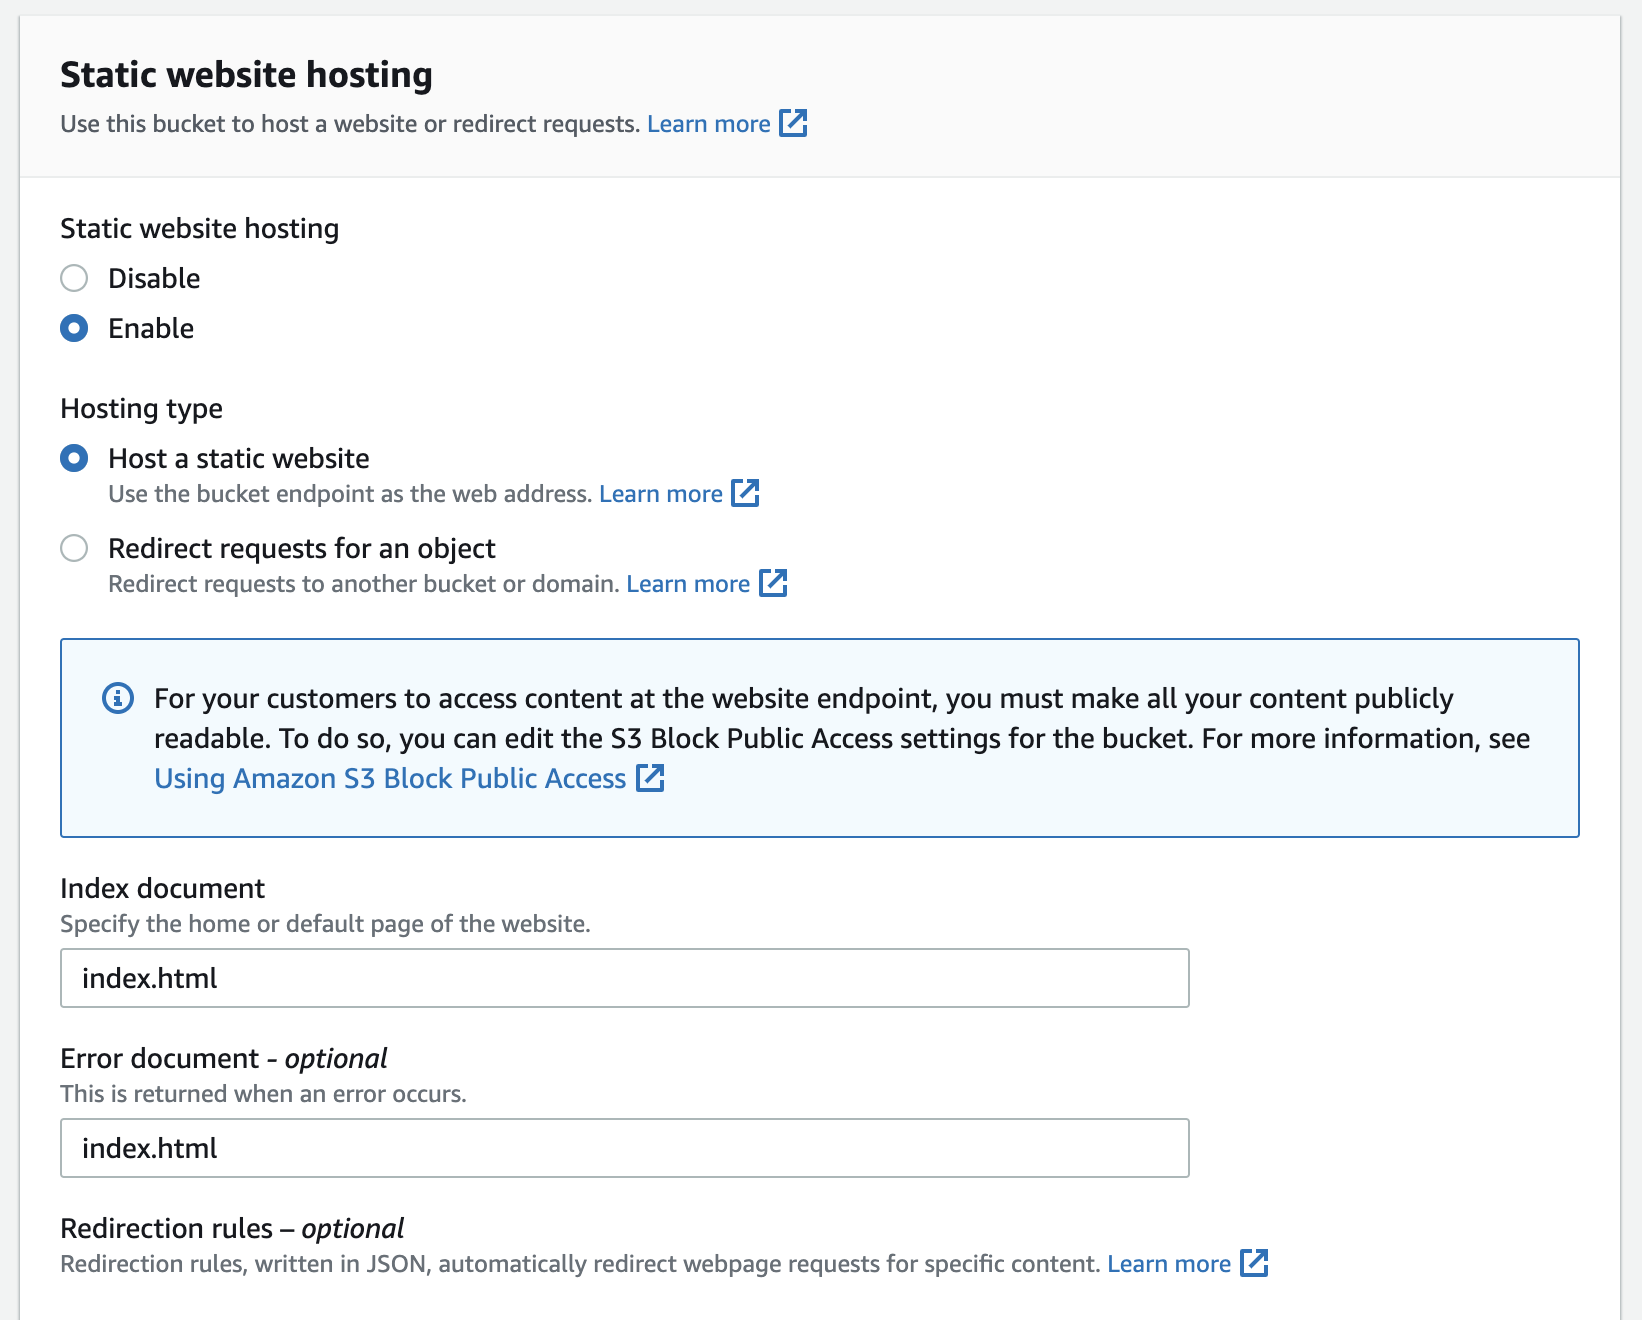
Once created, enable static site via the bucket properties section settings: 
The last step is to copy all built static files from the out/ folder. This can be done either via the Management Console or via the command line:aws s3 sync out s3://<PUBLIC_BUCKET>
Visit your domain to see your work! 
What's Next
In the following blog post, the existing website will be extended to route traffic through a content distribution network (CDN) which will handle HTTPS requests and caching.